Manually Label Object Detection Dataset With Bounding Boxes
This tutorial guides you through manually labeling an object detection dataset. You will learn how to create labeling tags, draw bounding boxes, and assign tags to objects for accurate dataset annotation.
1. Introduce Object Detection Labeling
Today, you will learn how to label an object detection data set. This is what we'll find the first time we open the labeling section in a dataset.

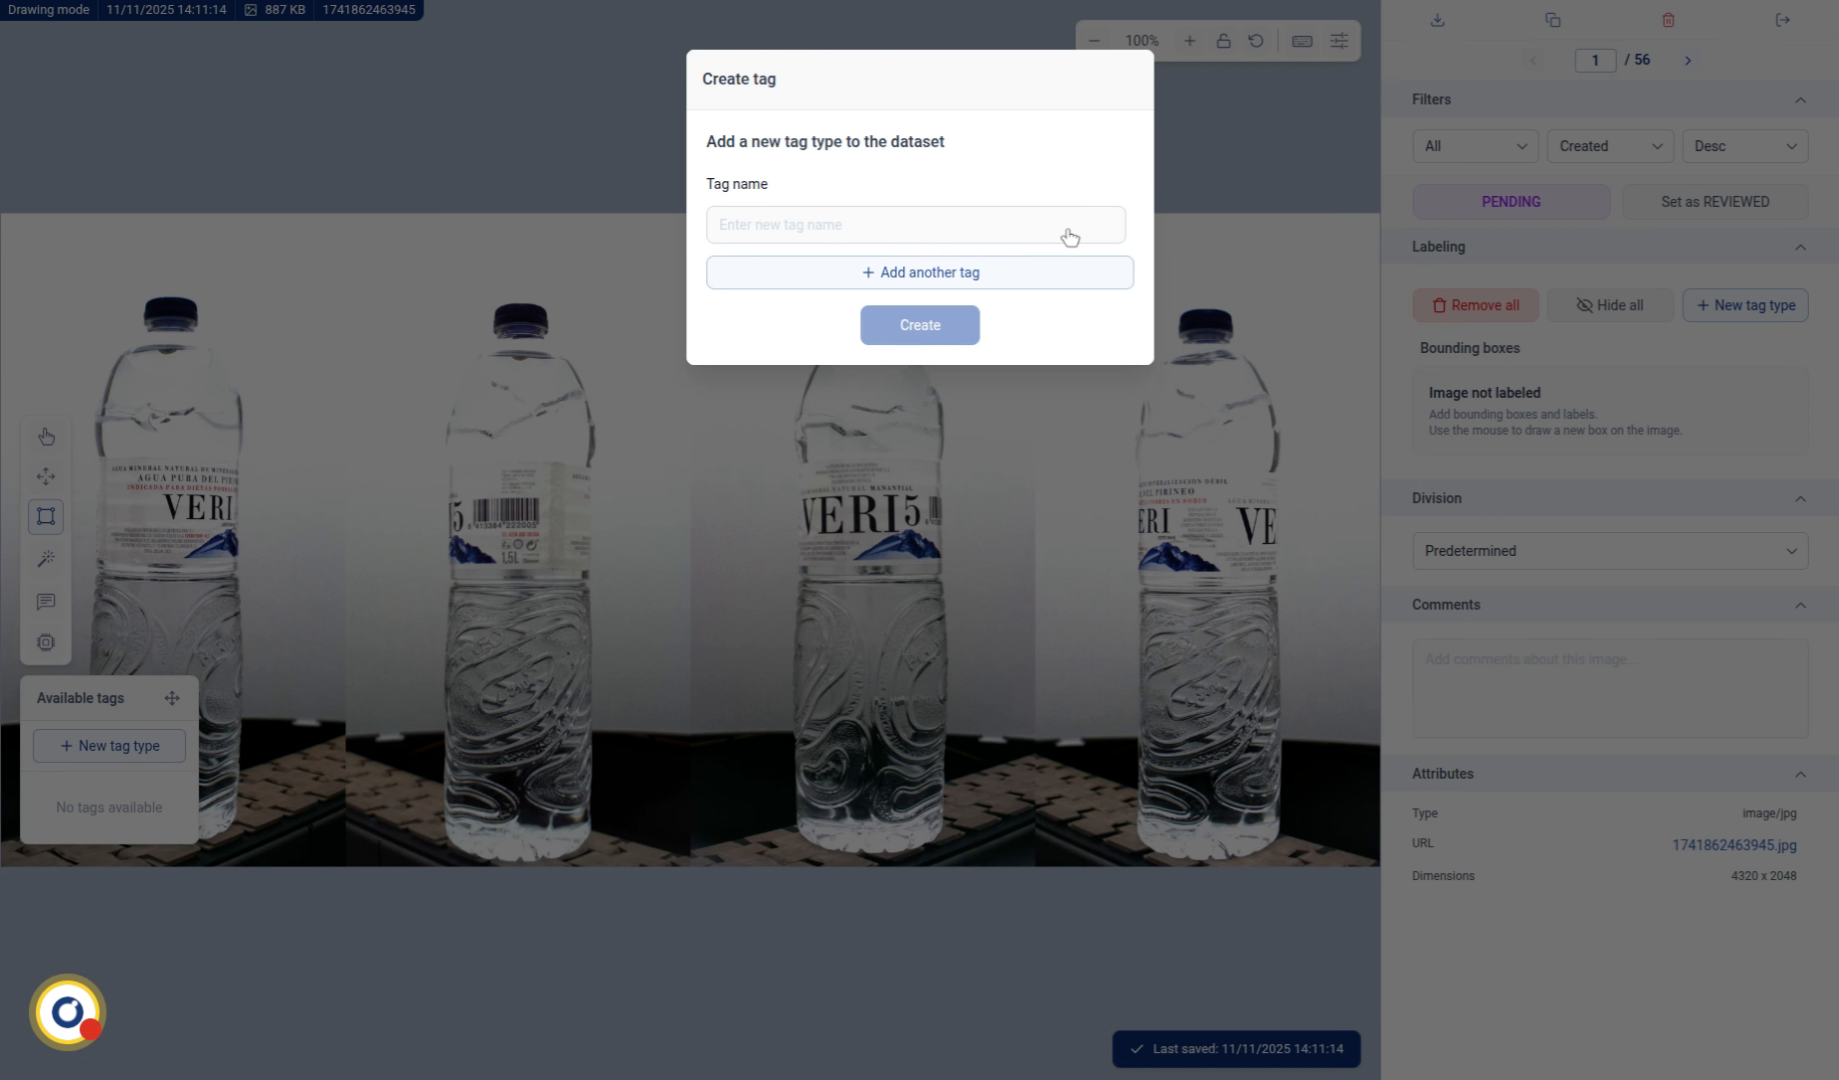
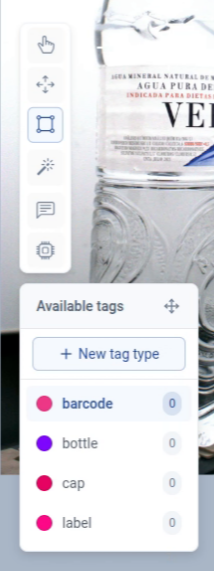
2. Create Labeling Tags
Click the Next button to continue setting up your labeling tags.

3. Enter Tag Label Name
Write a tag name you want to use in your dataset.
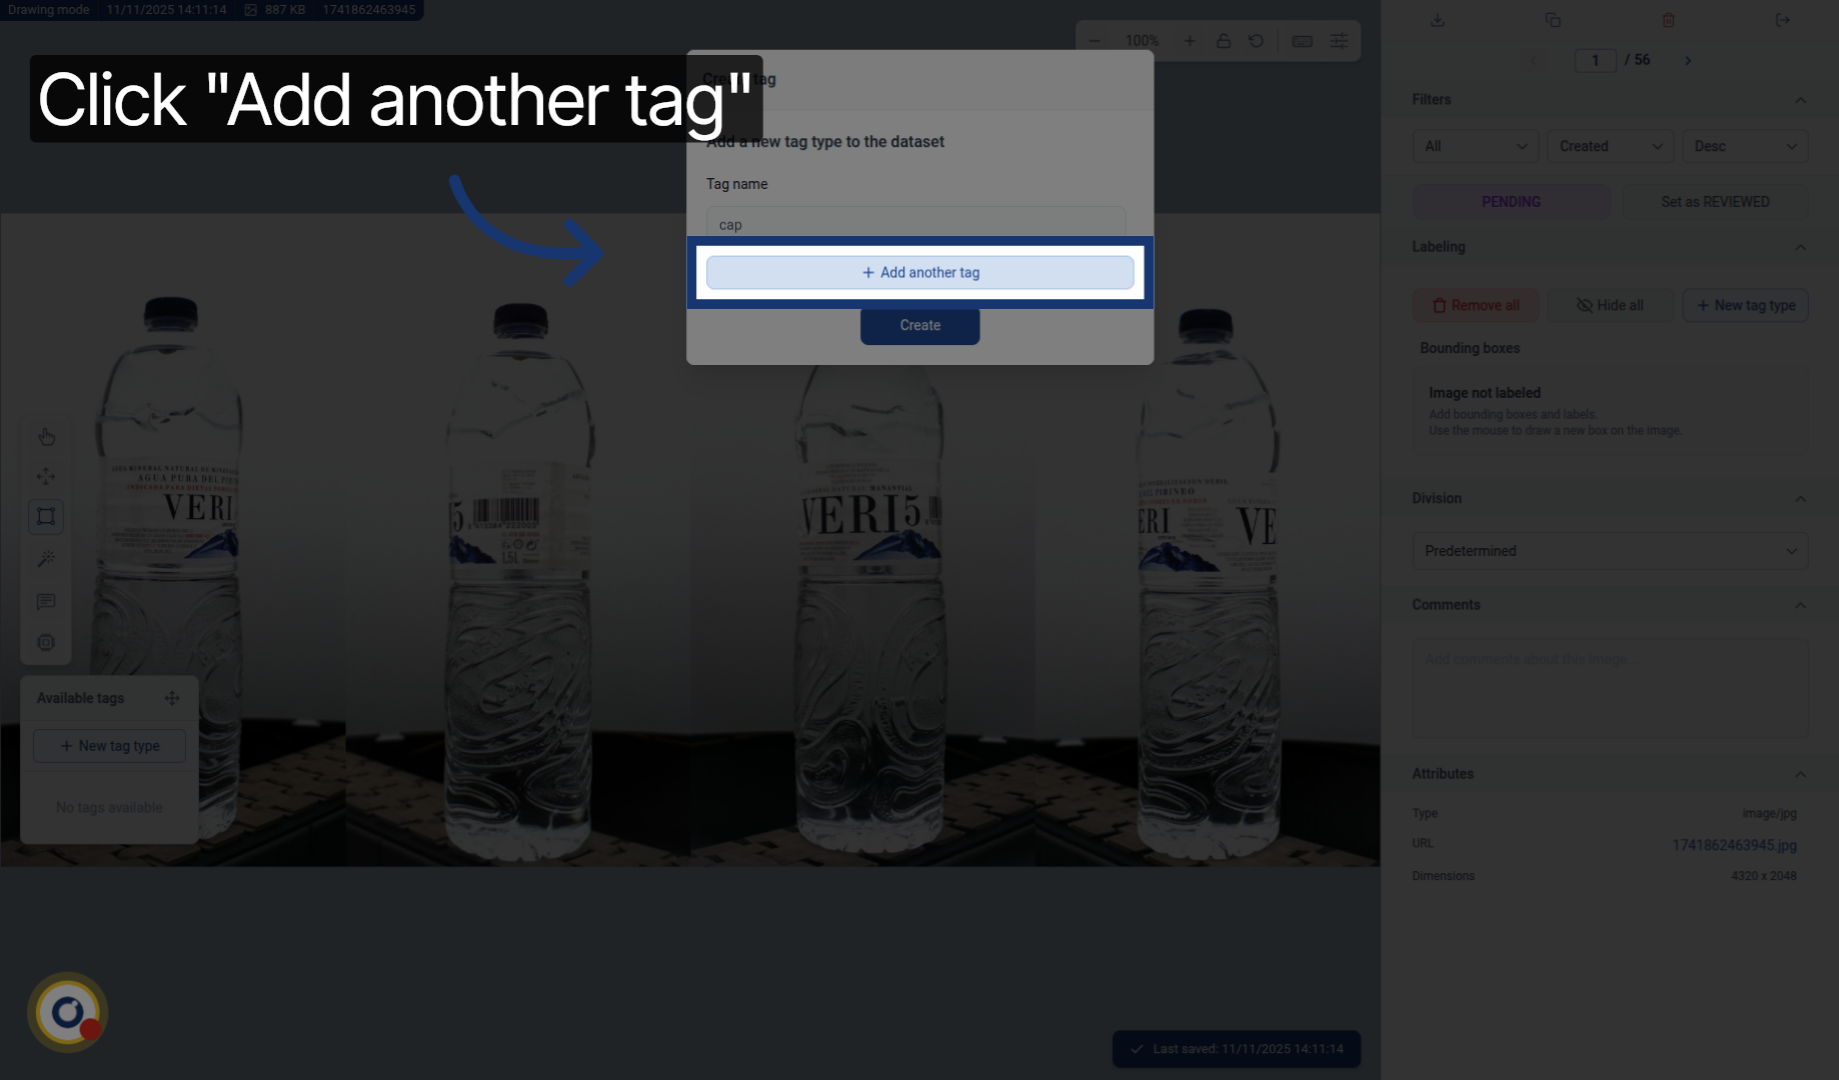
4. Add Additional Tag
Click the Add another tag button to include more tags for your dataset.
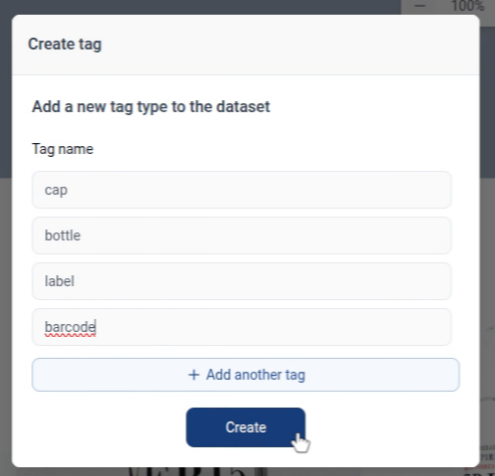
5. Create Labeling Tags
We just press Create to finalize the tag setup.
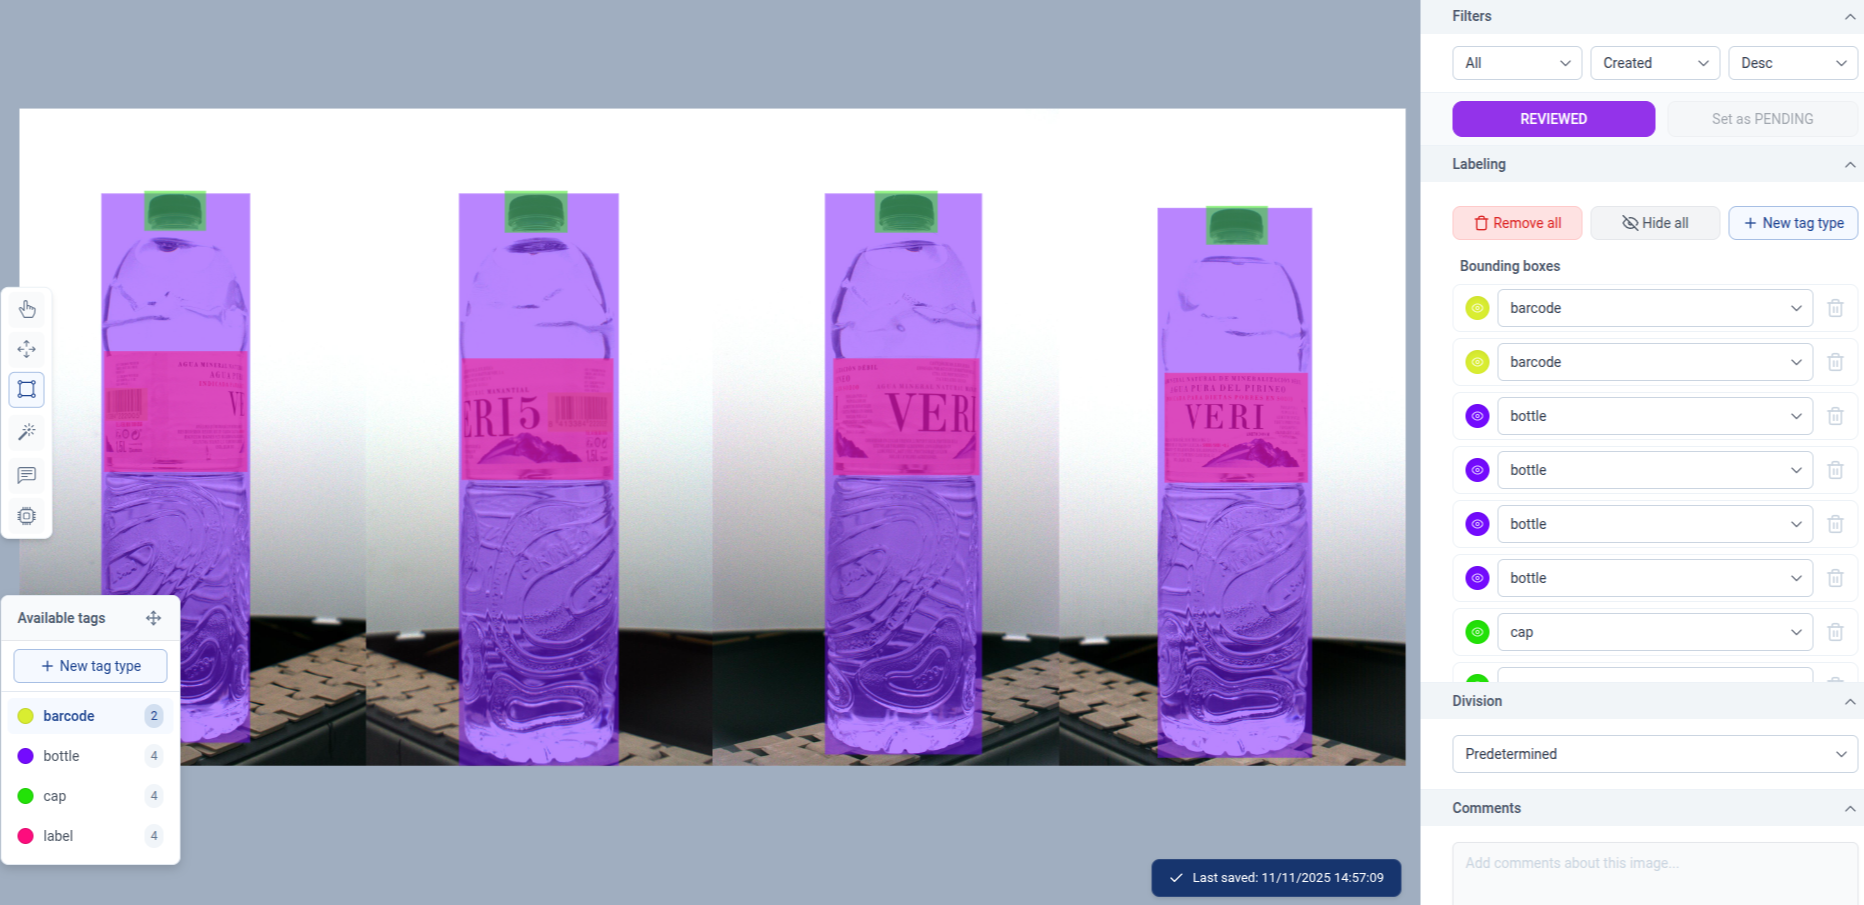
6. Tags Created
And we have the tags created.
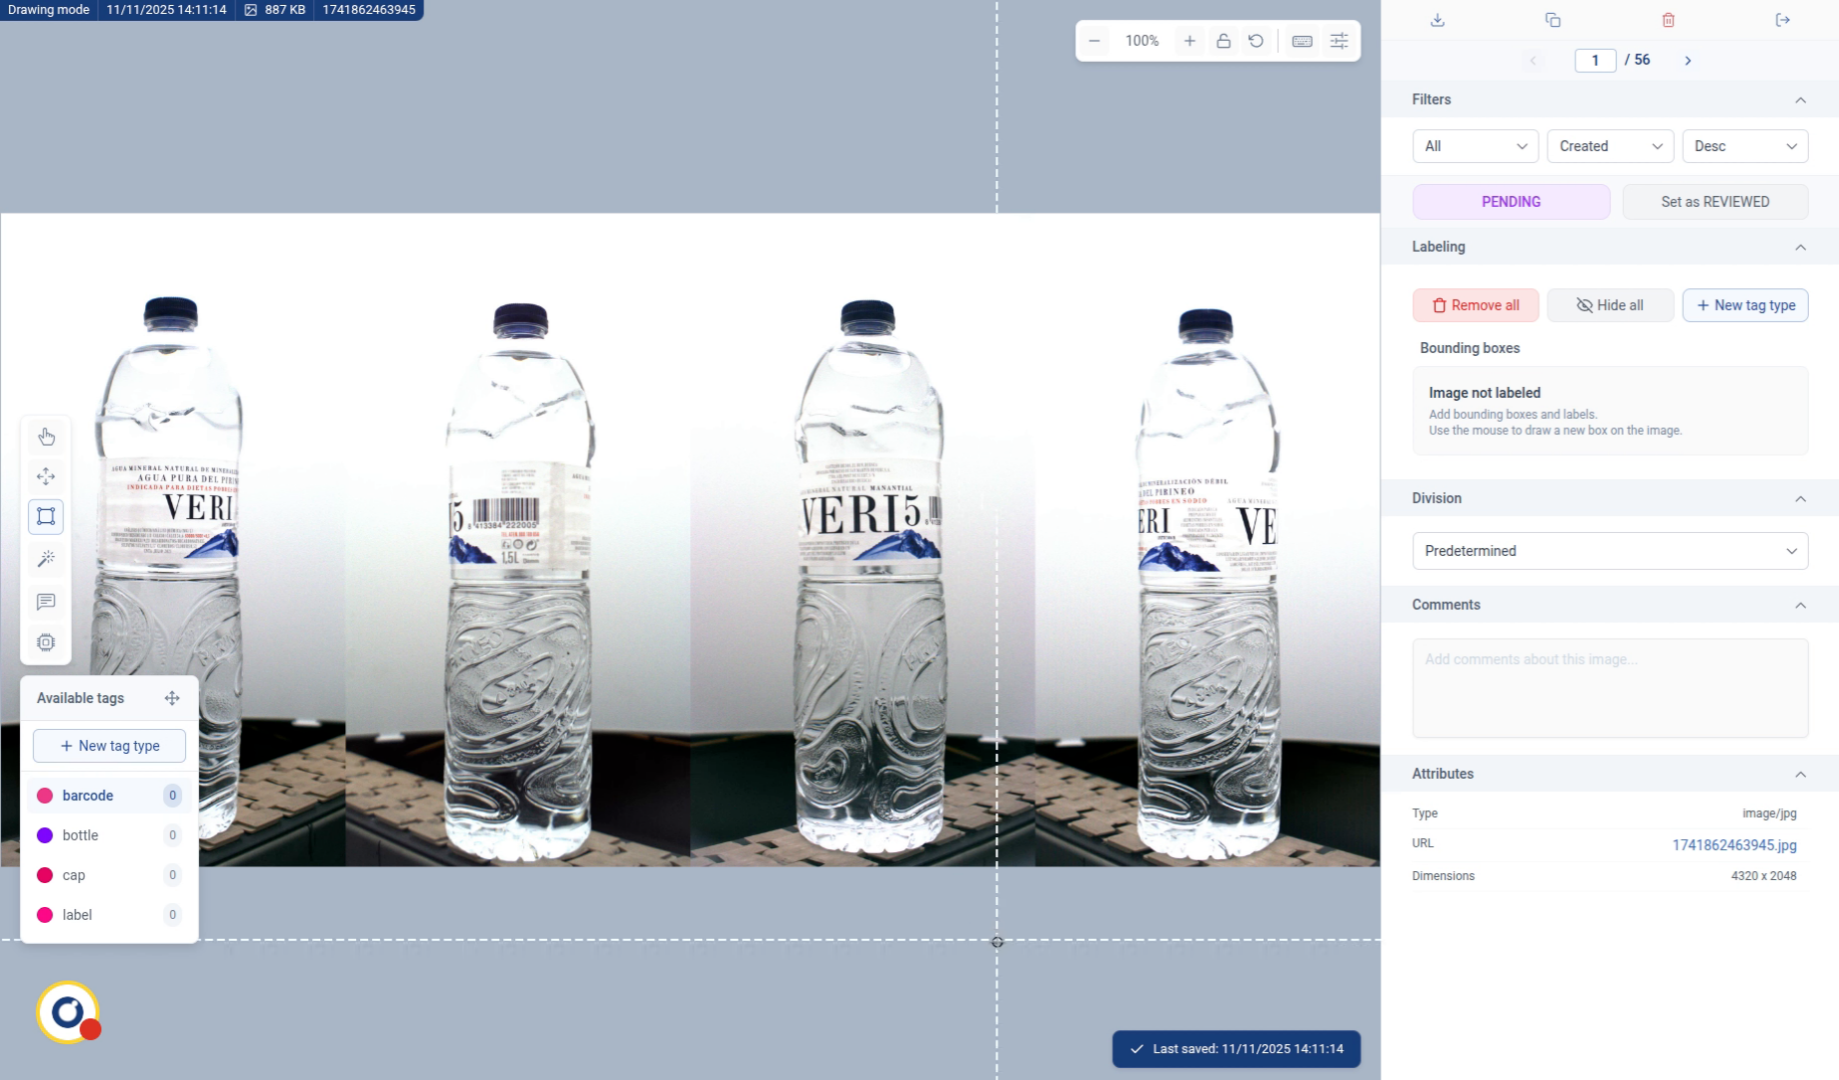
7. Start Drawing Bounding Box
Now, with the tool called Draw bounding box selected, we can start drawing the bounding boxes.
8. Draw Bounding Box
Press one corner and then drag to the opposite corner to create a bounding box.
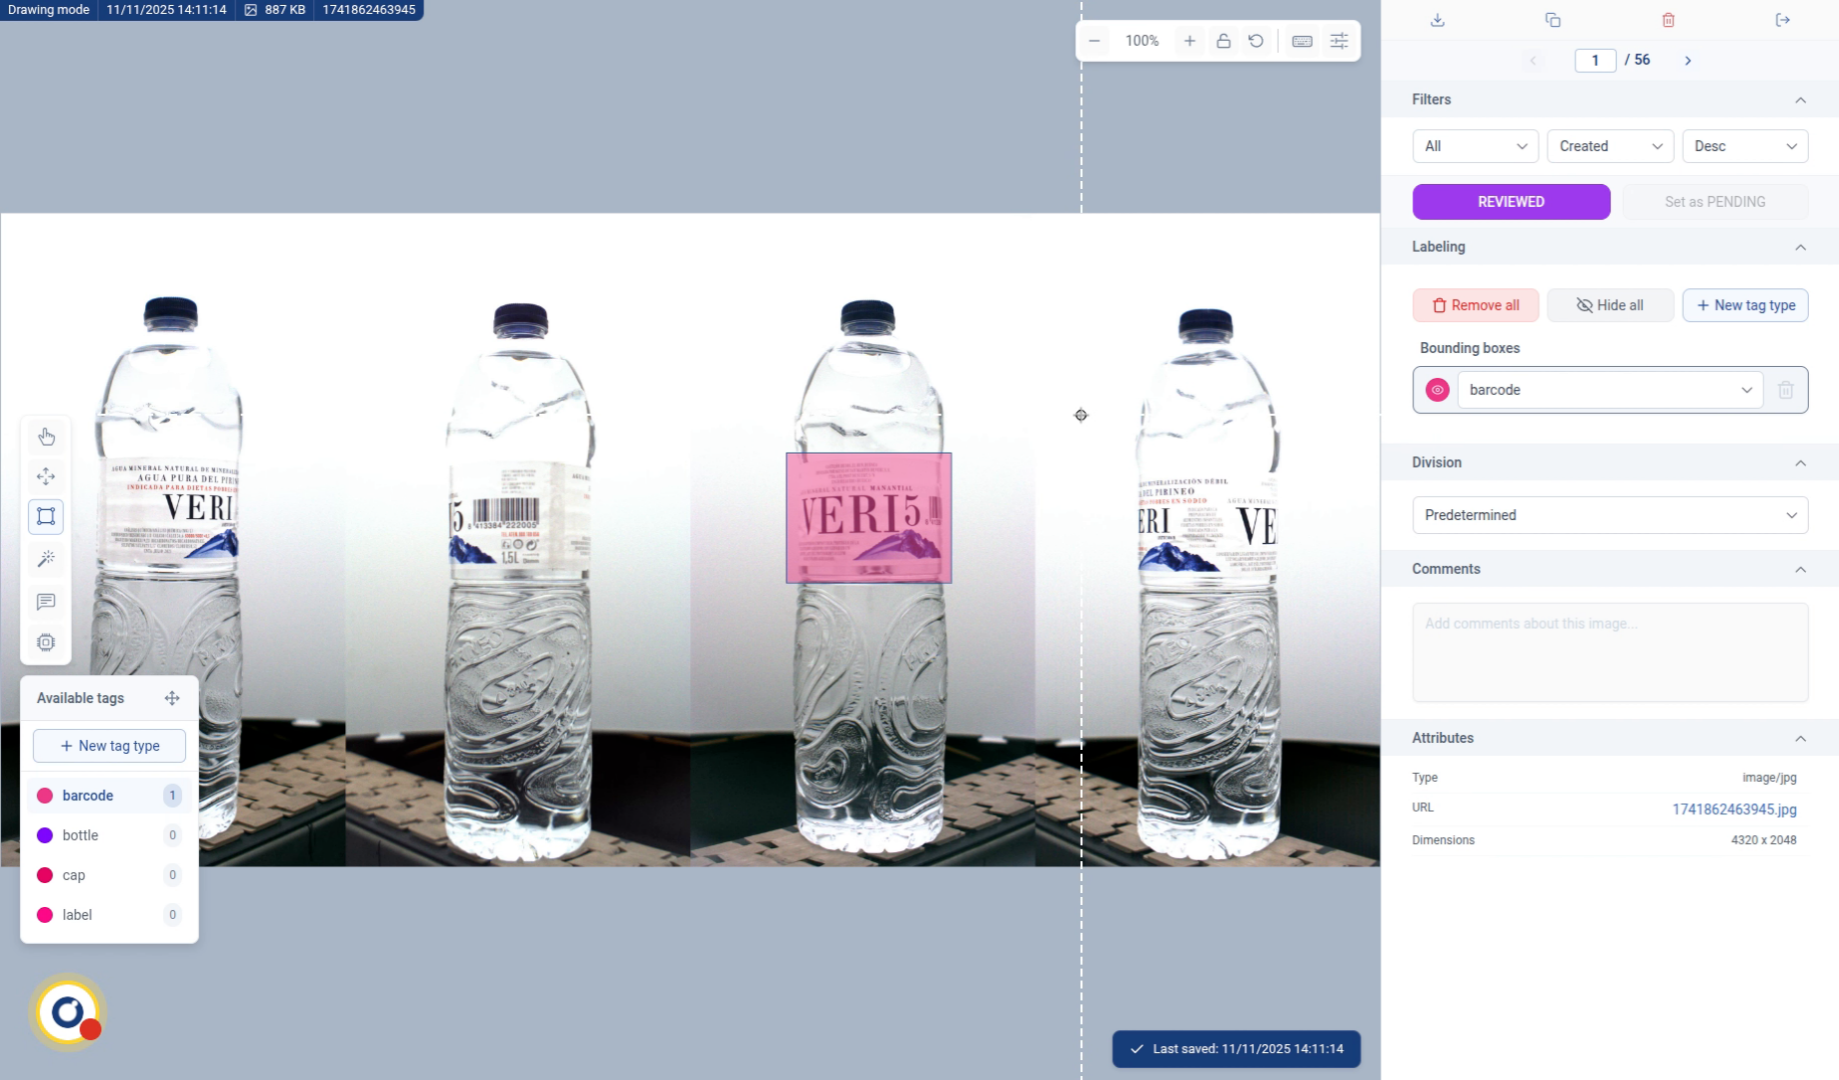
9. Select Tag for Bounding Box
In this case, the tag is a label not a barcode so we simply change it.
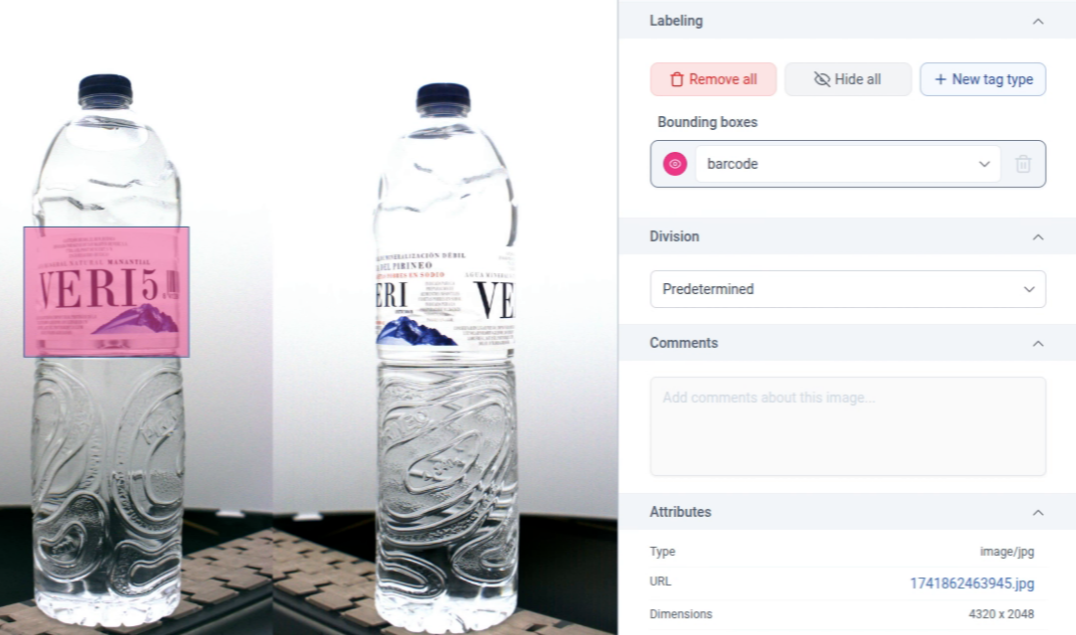
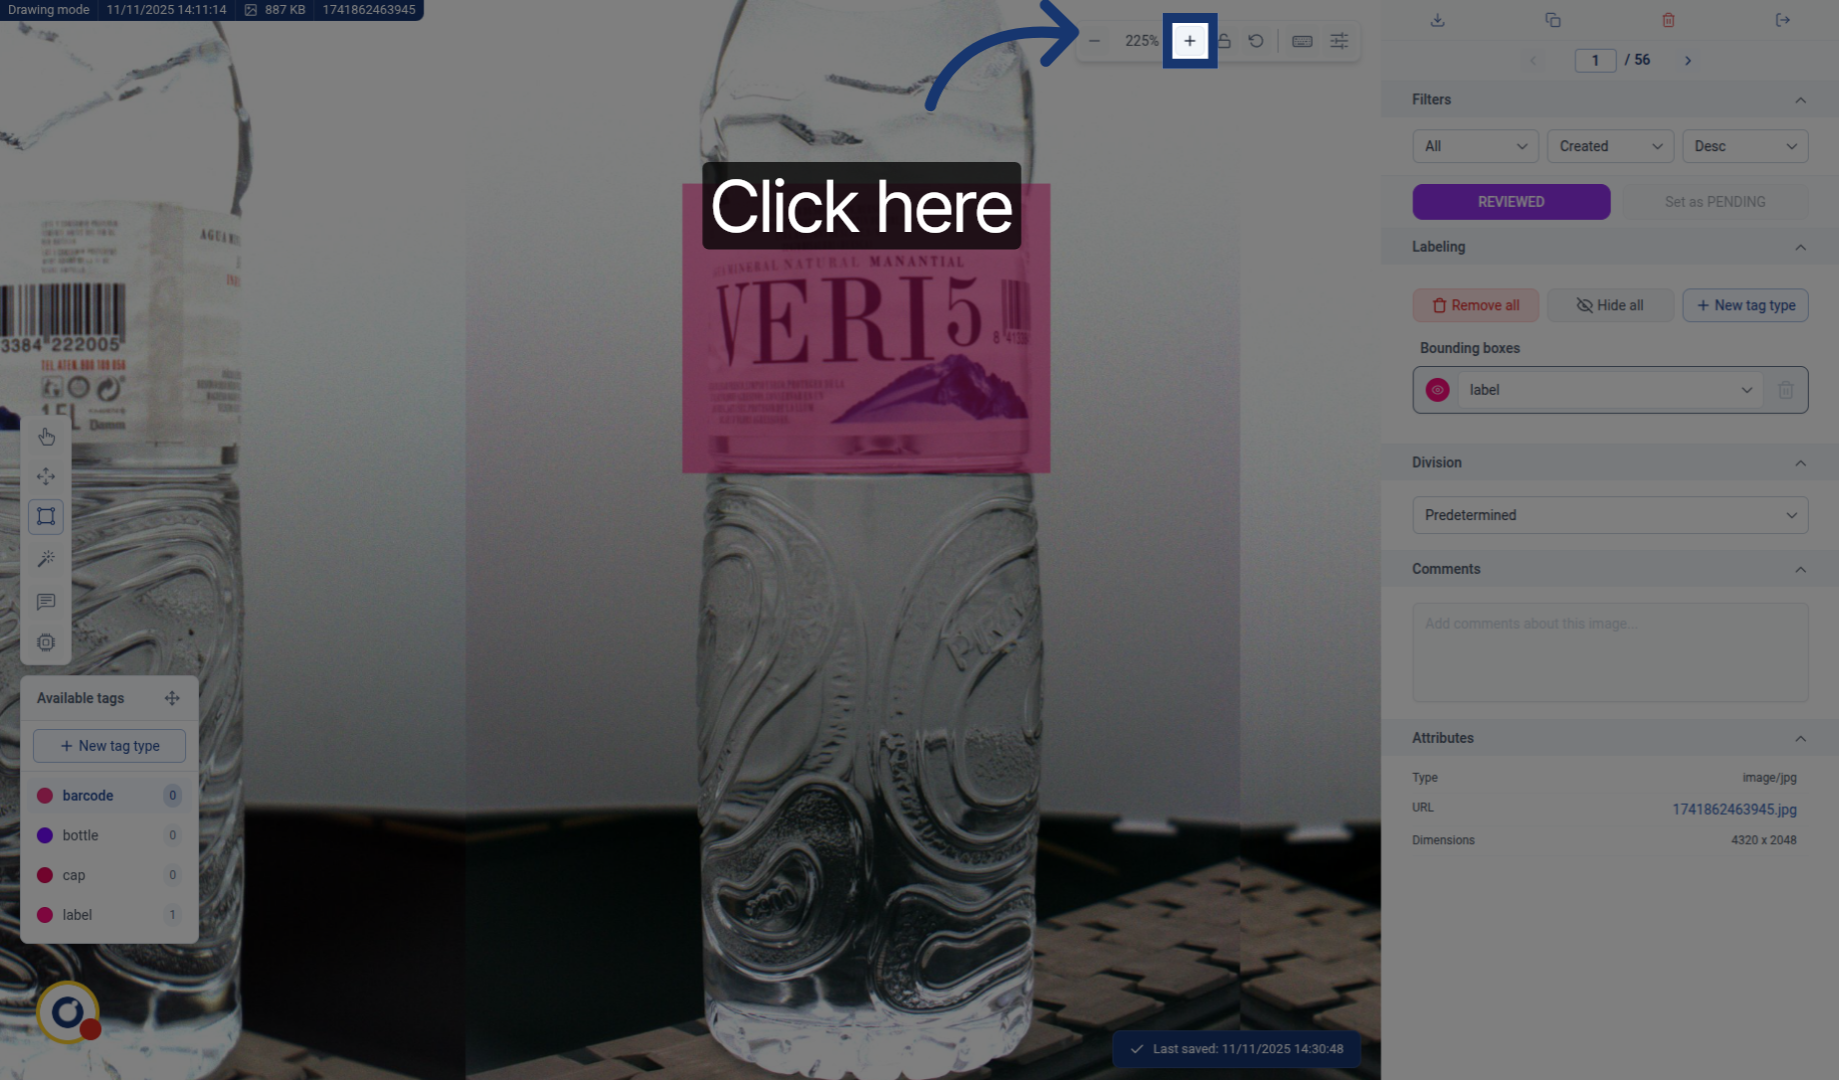
10. Zoom to Adjust Bounding Box
We can zoom in using Ctrl + Mouse Scroll or the "+" button in the top menu to get a closer view.
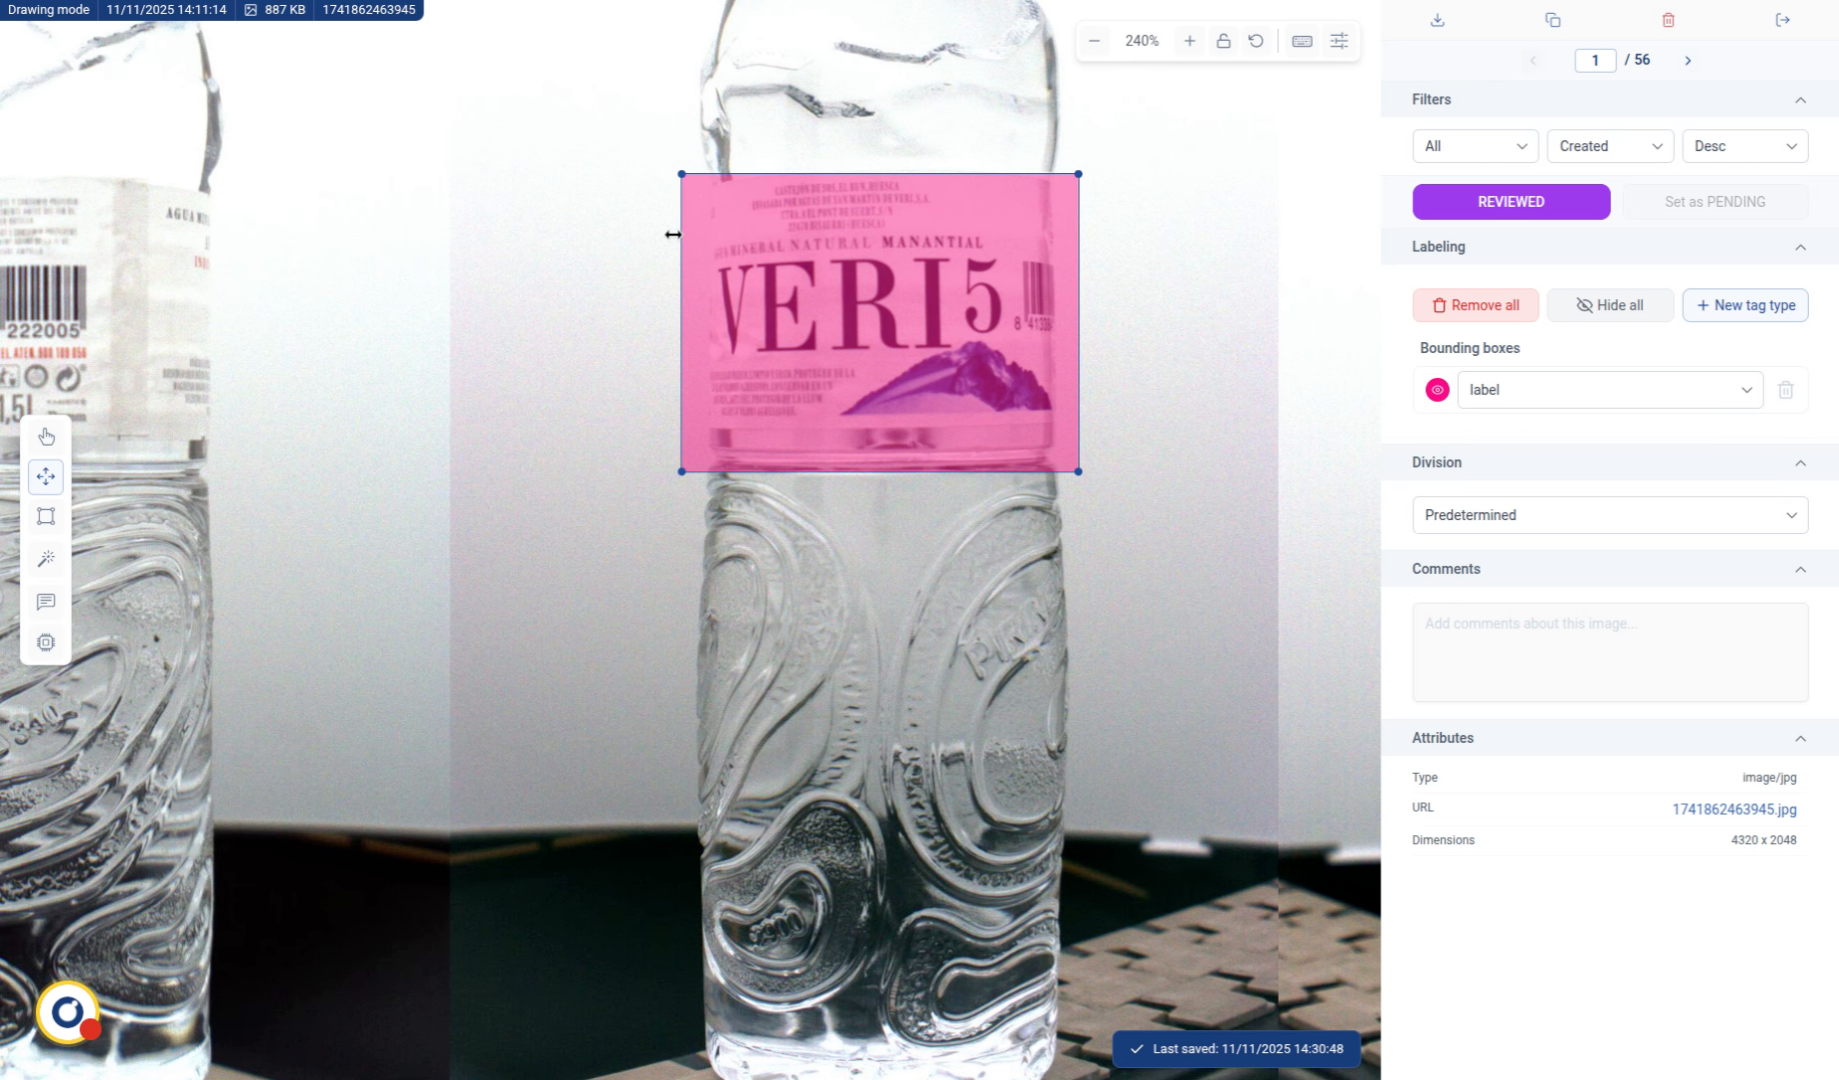
11. Correct Bounding Box
We use this tool to move the bounding box to the desired position.

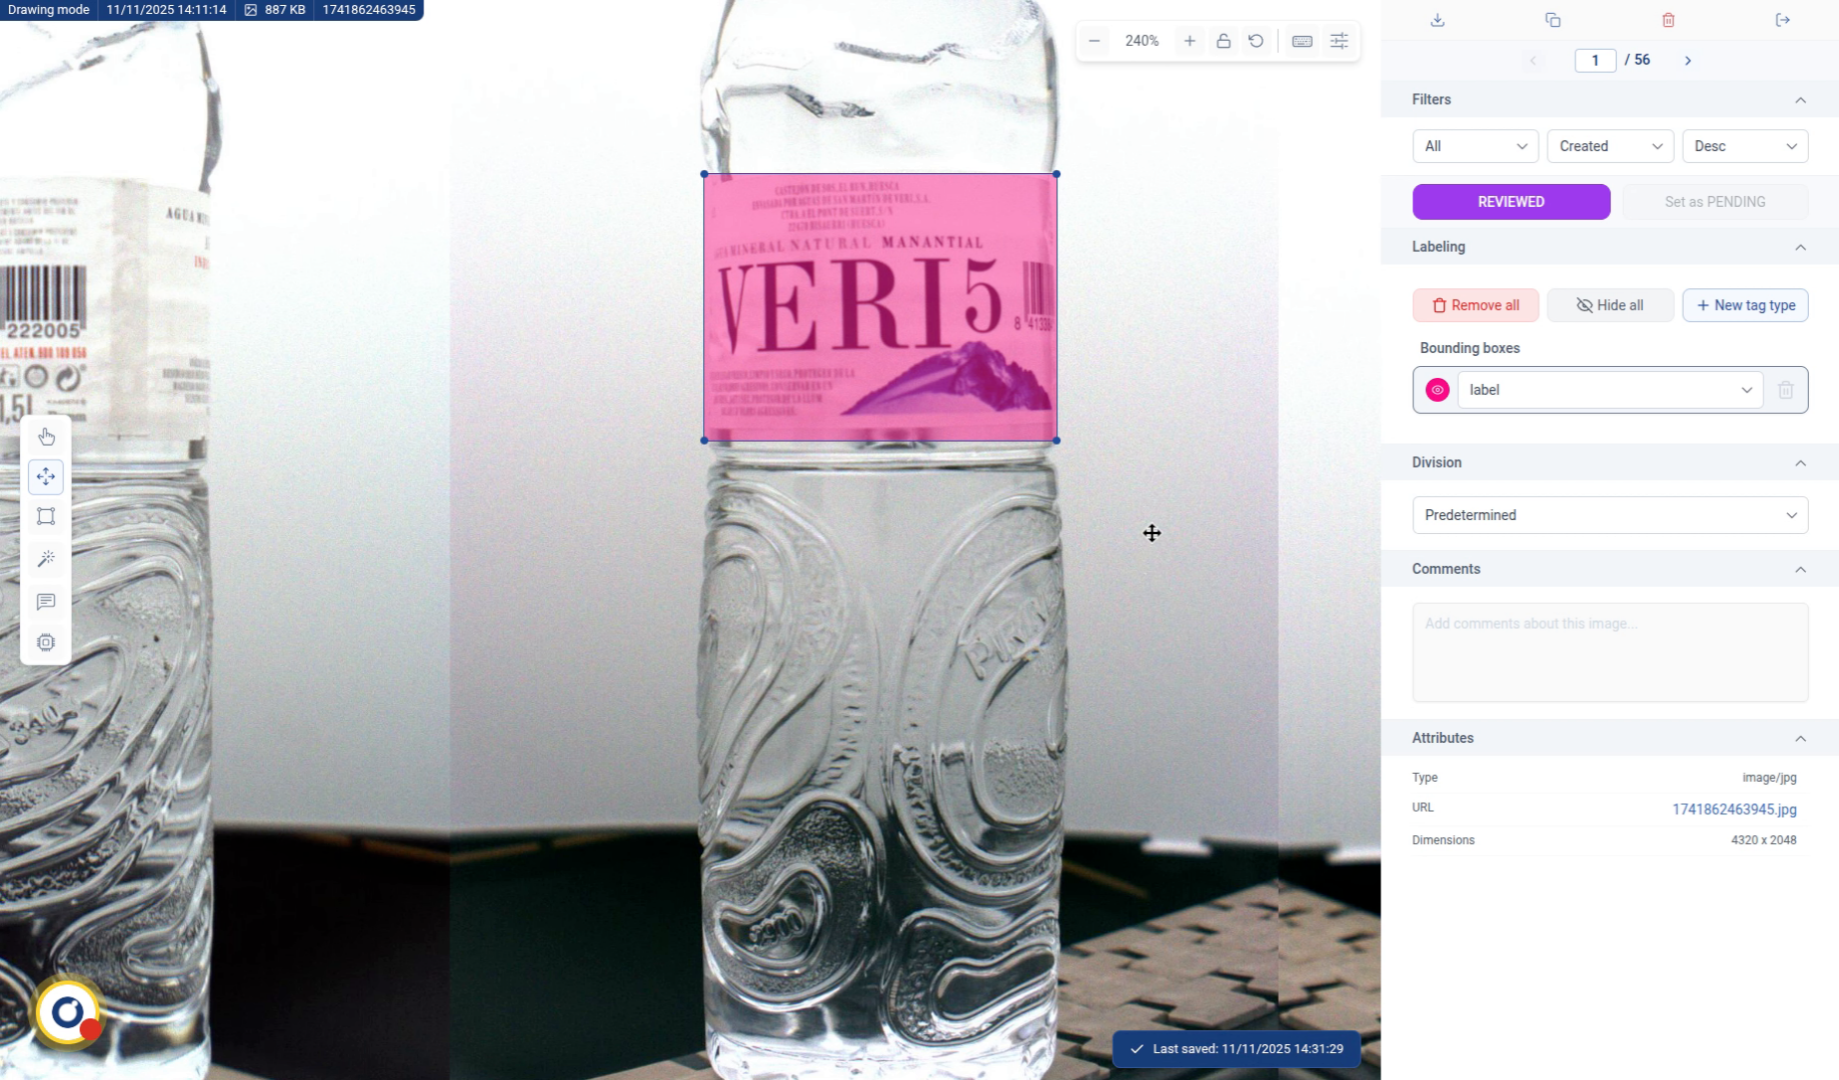
12. Adjust Bounding Box Position
With this tool, press the desired bounding box to adjust its position.
13. Fixed
14. Continue for all detections and images
Keep labeling all the images until you’re finished!
Remember, this is manual labeling, don’t waste your time doing everything by hand. Use the available tools to make your work easier: Smart Labeling, Auto Labeling and Inference.